
THE PARTS LIST
This page will walk through my build and interpretation of a usable all-sky camera. All parts were bought from Amazon and my local hardware store. Construction was aided by Brian Cooper. The above video details the camera build quality and I’ll post a video of the camera in use at the bottom. You can also jump to our Live All Sky tab to see each camera live now!
Here is the link to my amazon parts list: https://www.amazon.com/hz/wishlist/ls/37P28WELSJR8M?type=wishlist
In it, you will find:
1- Enclosure for the device
2- Dome
3- Raspberry Pi 3b+ with heatsinks, and power supply
4- Hole Saw bit to drill the hole for the dome
5- 1ft USB Connection cable to go from the RP3b+ to the ZWO camera
6- Waterproof USB connector
7- 12ft USB cable to power your device
8- 1ft USB cable to go from the power micro USB connector to the Waterproof USB Connector (for external power)
9- ZWO 120 Camera – Research your choice here, different cameras have different resolutions
10- 128gb MicroSd Card
Should you want to build a POE setup- Purchase these additional components and be aware you’ll have to wire a Cat6 patch cable internally. You will also need to remove the casing of the POE Splitter to ensure fit in the case.
11- POE Splitter 5v USB power and Ethernet to RP3b+
12- Waterproof Ethernet connector (replaces item 6 if you choose to go this route)
13- If your router does not provide POE, this POE Injector works flawlessly with this setup
From your local hardware store:
14- Silicone adhesive for the dome- under the flange, and on top of your bolts
15- 6 stainless steel bolts, 6 flat washers, 6 lock washers, and 6 nuts for the dome retaining ring
16- 1/4 20 fitting for the bottom of the camera to screw it to a tripod
17- 4 tiny self threading screws to retain the RP3b+ to the 3D printed base (more on that later)
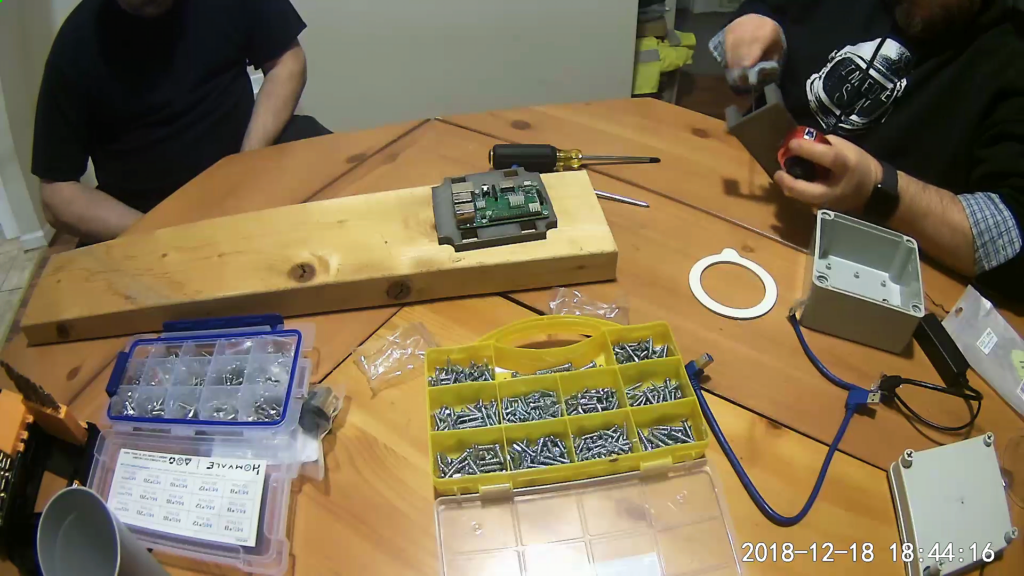
3D PRINTING
You’ll need to 3D Print three individual pieces that are very straightforward. I’m linking Brian’s write up from Thingiverse here for the STL files + the Fusion 360 file. If you use it, please link back to Brian’s 5×5 All Sky build on Thingiverse. I also have made some improvements to the initial design. Simple things that help with build and fit. I will give them to Brian to upload on Thingiverse, but if they are not 2020 files, leave a message and I’ll provide you with them!
https://www.thingiverse.com/thing:3345188
BUILD PLANNING
Choose what type of camera you want to build.
USB Powered Camera- A portable camera for any manner of time lapse? Able to power from a USB battery or wall charger (my iPhone phone brick powers the camera just fine with the USB cable in the above parts list) and able to stream through your hot spot on your phone? Then leave out parts 11, 12, & 13.
POE Permanently mounted camera- This build was my first build and works perfectly, but it is limited. It is dependent on a wired connection and a POE. Meaning, you’ll have to take the camera apart should you want to power it differently. The benefits of this system are simple. It’s immovable and it works. All the time. (save for power outages and bad POE switches)
It is my recommendation now, that everyone build the USB powered camera as it works easily on wifi + can easily be converted to a permanent camera with the little work.
After choosing your power setup, it’s time to think about what kind of FOV- Field of View you want. Do you want a wide, horizon to horizon camera for simple all sky views? Then the ZWO120 and it’s all sky lens will give you what you want. If you want a somewhat cinematic full HD view, the best choice is the ZWO290. Here’s a quick reference sheet I made to understand what each camera would display with the supplied All Sky Lens.
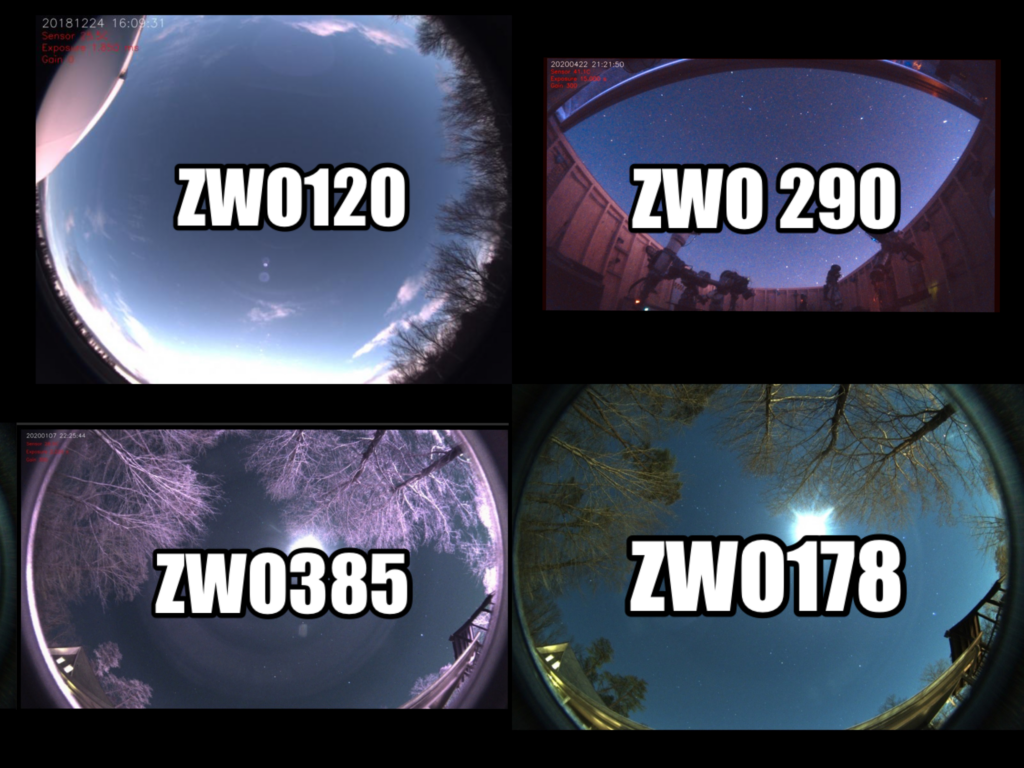
Full disclosure: The ZWO120 shot was taken by Peter L. of Canada in his quest to gain sharp focus with the help of the amazing internet forum- CloudyNights.
You’ll also notice slightly different colors based on the camera. This is due to the fact that the 290 and the 385 do NOT have an IR Cut filter installed so while they are much more sensitive to that spectrum of light, it does make the color appear somewhat washed out. I suggest looking through my videos on Youtube and all the footage I’ve shot with my 290 and 385.
CONTROL SOFTWARE
Now we move to the more challenging part of the build. Raise your hand if you understand 10- goto 20… If that little phrase reminded you of high school or elementary school, you are going to be fine. Knowledge of Linux and basic coding will help you greatly. The good news here is there is a WONDERFUL knowledge base.
And here is maybe the most important part of this entire blog- the work done by Thomas Jacquin. This brilliant human being put it all on GITHUB where underlings like you and I could find and utilize his brilliance. Thomas, I’d love to buy you a beer one day!
Instead of recreating what Thomas already has done, I’m going to simply link you to his GitHub Portal:
https://github.com/thomasjacquin/allsky
You’ll notice the information there is laid out extremely well from a walk-through of the code along with the actual troubleshooting forum for when you inevitably run into a problem. I will say, on your first build, you should absolutely procure an additional USB Keyboard and Mouse along with an HDMI supported monitor. Once you get familiar with VNC- you can move your pi to a “HEADLESS” setup and just dial into it remotely. A word of caution- make sure to disable said system unless you have the correct security protocols on your network.
Installing the OS- Raspberrian Buster or whatever you choose is easier if you can interact with it directly. The forums on GITHUB are extremely useful and will point you in the correct directions. Be forewarned, it’s not advisable to post a question without any research on your own beforehand. Most questions you’ll have will be posted in the GITHUB forum. Unless you enjoy crickets… then be my guest. 🙂
THE BUILD
Now that we’ve picked our parts, and got our software running on the pie, lets talk about the build. Folks who are handy are going to enjoy this. Folks who don’t have a lot of tools may find themselves in a trek across town to borrow a friends drill or hole saw (if you don’t want to buy the cheap-ish bit I listed in the parts list- I bought one just to have it and I’ve used it a dozen times since then – not just on all sky cams although I’ve built 8 now- HA).
Here’s the order of the build:
1- Cut the hole in the enclosure box. This will give us ample time to test it’s waterproof abilities.
2- Seal the dome, drill the holes to affix the printed retaining ring to the dome. Do not skip the retaining ring, or the silicone. These are essential based on my testing.
3- Check fitment of 3D printed parts before affixing the RP3b+ to the 3D printed base. Additional sanding may be required for proper fit.
4- Affix the ZWO Camera to the 3D printed Gantry and attach the cables.
5- If you are building a POE setup, wire running is a chore as it’s tight. Removing the plastic from the POE spliter is difficult but possible. A set of cell phone tools is handy for this task.
6- Us a 1″ panel bit to drill the hole in the proper side of the case- take care to ensure the 3D Base is in the proper direction as it is designed/printed with the bottom of the case in mind. *The updated STL makes an additional room for a 1/4 20 fitting at the bottom of the case by adding a recess in the bottom of the 3D printed base.
7 Attach the Gantry to the Base; plug in your cables and ensure fit.
8- A tiny bead of Silicon is advisable for the USB or Ethernet Connector. I can’t stress enough the need to be measured in this application.
9- Connect the camera and let it run for three days on a dependable power source to ensure your files are being saved as you’d like, etc.
10- Post a photo of it to our SpaceForEverybody FB page or tag us in any of your social media platforms!
11- I’m sure I forgot something. Haha!
MODS
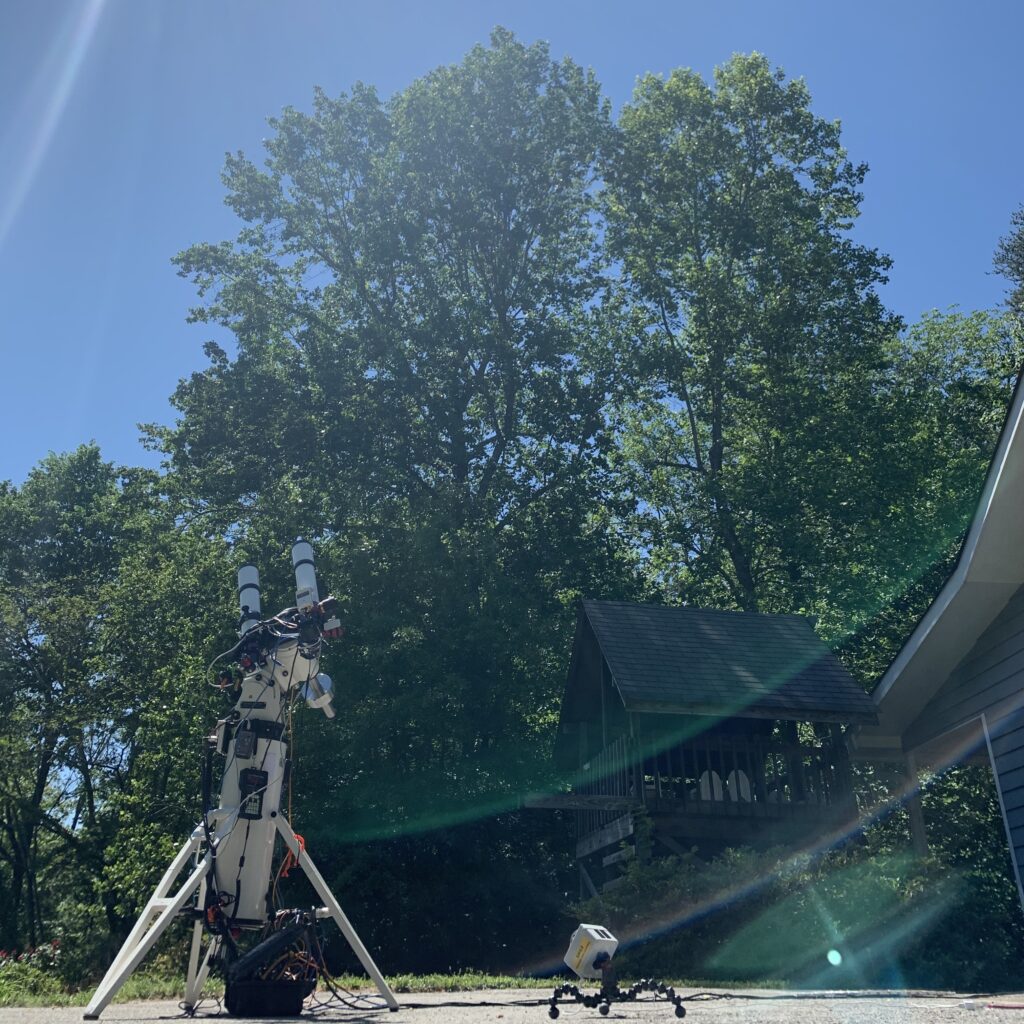
I mentioned the 1/4 20 jack several times and it really helps make the camera super portable. With the addition of some Joby Gorilla legs, you can basically take this thing everywhere. Here’s my little guy during a recent LIVE Solar session.